
There’s a small bowl on the kitchen counter, a junk drawer that never fully closes, a rubber band lying on top of both of them. Most of us treat it as afterthought packaging – the thing that arrives around your broccoli or bundled with a stack of mail and ends up doing nothing useful for the rest of its life. But here’s the thing: that little loop of vulcanized rubber is one of the most quietly capable objects in your home, and it’s been there the whole time.
Rubber bands have been around in their modern form since Charles Goodyear patented vulcanized rubber in 1844, with the first patent for a rubber band issued to Stephen Perry of London) in 1845. For nearly two centuries, they’ve held together everything from rolled newspapers to surgical equipment. Yet most people still only use them for two things: bundling items together, or snapping at a sibling. That’s a waste of remarkable potential.
What follows are 19 genuinely useful things you can do with them, right now, with whatever’s already in the drawer.
1. Open That Stubborn Jar Lid
Every kitchen has a jar that refuses to cooperate. The pasta sauce you need right now. The pickle jar that’s been sitting in the fridge taunting you for a week. Before you resort to banging the lid on the counter or running hot water over it, try wrapping a wide rubber band around the lid’s edge.
The rubber band works by increasing the coefficient of friction between your hand and the jar lid. In plain terms: your hand normally slides against the smooth metal surface, which limits how much turning force you can actually apply. The rubber band stops that slipping and lets you transfer your full grip strength into the twist. With jars, thicker rubber bands work best, but you can use several smaller ones layered together to create the grip.
Wide, flat bands spread pressure far better than thin ones, which tend to bite into fingers and roll off the cap. Look for bands that are 3 – 6mm wide – the kind used on broccoli bundles or parcel packaging. Dry both the lid and your hand first for maximum effect.
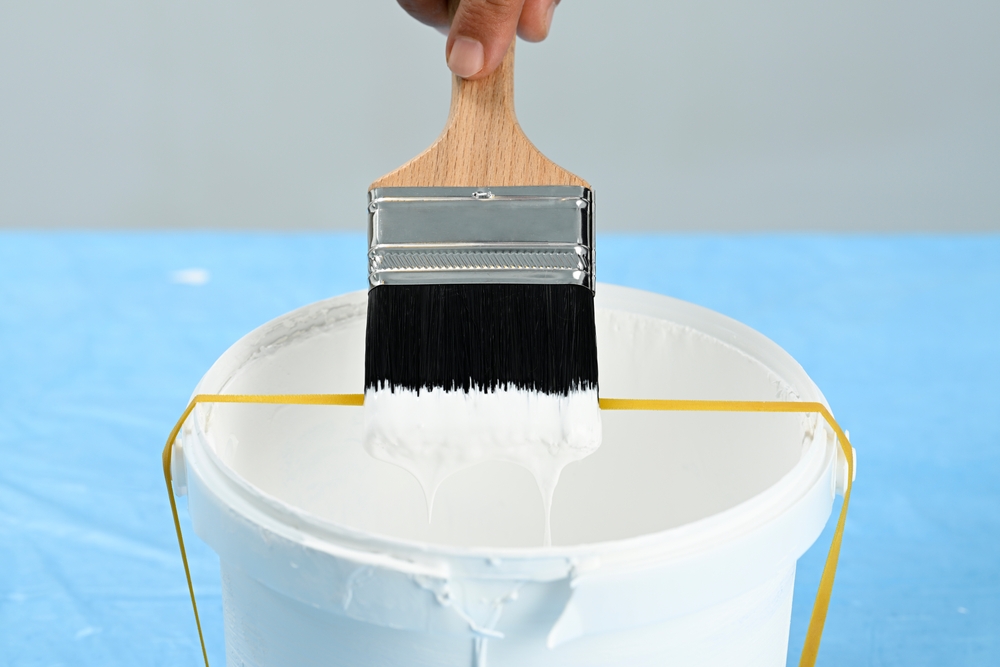
2. Stop Paint Drips in Their Tracks
If you’ve ever used a paintbrush directly from a can, you know the ritual: wipe the brush against the rim, load up the edge with excess paint, watch it slowly run down the side of the can and onto whatever surface the can is resting on. It’s one of those small annoyances that nobody needs.
The fix is easy: stretch a rubber band across the top of a paint can, dip your brush into the paint, and slowly wipe the brush across the band to remove any excess. The paint falls back into the can and you enjoy a drip-free experience. It keeps the rim clean, which also means the lid will seal properly when you’re done – no dried paint crust holding it half-open.
As a bonus, when you finish a paint job and want to know how much is left in each stored can, mark the level with a rubber band on the outside. Next time you need a small top-up, you can scan your shelf without opening anything.
3. Keep a Door Open (Without Wedging Your Foot Under It)
Hands full of groceries. A breeze coming through the hallway. A door that keeps swinging shut just as you need it open. There’s a fix for this that costs nothing and takes three seconds.
Loop a rubber band around one doorknob, twist it, and slip the other end over the knob on the opposite side of the door. The band spans the latch mechanism and stops it from catching. The door stays open, the latch can’t engage, and you don’t need a doorstop you’ll inevitably kick across the room.
This also works as an accidental childproofing measure. It can prevent you from getting locked out of a room, and it’s just as easy to remove as it was to put on. No hardware, no installation, no residue on the floor.
4. Stop Clothes Falling off Hangers
Wire hangers are slippery. Even plastic ones can fail to grip silky fabrics, strappy tops, or that one blazer whose shoulder seams refuse to stay put. The standard fix – buy velvet-covered non-slip hangers – costs real money and takes up storage space.
Instead of replacing all your hangers, add rubber bands to the ones you want to keep. Wrap a rubber band around each end of the hanger and it will grip clothing, preventing anything slippery from sliding off. It’s the same principle as a velvet hanger: friction where the fabric rests. The only difference is that this costs you nothing, and you can do it with the rubber bands sitting in your junk drawer right now.
5. Mark Your Place in a Book
Dog-earing pages is a slow form of book destruction. Loose paper bookmarks fall out at the worst possible moment. Sticky notes curl up and lose their grip. What actually works is a rubber band.
Wrapping a rubber band around the pages you’re currently reading is one of the most effective uses for a rubber band because it will never lose your spot – unlike a bookmark that can easily fall out. Loop it around the front cover down to your current page, and it stays put whether the book is in your bag, on the nightstand, or being held open with one hand.

As a bonus, if you’re stuffing the book into a bag, wrap an additional rubber band around both outer covers to avoid any damage to the pages inside. Two rubber bands and your book travels safely.
6. Make Your Soap Last Twice as Long
This one sounds small until you do the math. A hand soap dispenser, unimpeded, gives a far larger pump than most hand-washing situations actually require. Multiply that waste across every member of a household, every day, and you’re buying soap much more often than you need to.
Adding a thin rubber band about an inch below the nozzle on your soap dispenser stops anyone from pumping out too much product. The band acts as a physical blocker, limiting how far the pump can depress. It limits the soap dispensed with each pump, so even the most enthusiastic hand-washers won’t be quite so wasteful.
If you have young children, this is especially useful. You’ll notice the difference in how long a bottle lasts within days.
7. Get a Grip on a Stripped Screw
There are few things more frustrating in a DIY job than a stripped screw – one where the head has worn smooth and the screwdriver keeps spinning uselessly. The usual solution involves specialized extractors, which most households don’t own. The rubber band solution requires only what you already have.
Wrap a rubber band around a slick screwdriver handle for extra grip, or place one between the screw and the driver tip to prevent slipping when working with a stripped screw. The rubber fills the worn grooves in the screw head just enough to create traction, which often gives you the one clean turn you need to get it out.
Just place the band between the screwdriver and the head of the screw to get a good grip, then firmly turn the screwdriver to remove it. This works best on Phillips-head screws and is worth trying before reaching for a drill.
8. Keep Sliced Apples from Browning in a Lunchbox
Cut an apple for your kid’s lunch and it arrives at school looking grey and unappetizing. The usual fix is a plastic bag, which creates waste, or a container with a lid, which they’ll inevitably leave at school. There’s a better way.
After cutting an apple, place the slices back around the core in their original formation, then wrap a rubber band around the outside. The apple holds together, the slices are protected from air exposure, and it fits neatly into a lunchbox without any additional packaging.
The rubber band holds the cut surfaces in tight contact, minimizing how much air gets between the slices. This keeps the apple from browning before lunchtime without needing a plastic bag or making a child responsible for a container. It’s a small thing, but it’s the kind of small thing you’ll use every day.
9. Identify Wine Glasses at a Party
Hosting a gathering with more than four people usually ends the same way: a collection of abandoned glasses, nobody sure which one is theirs, someone inevitably drinking from the wrong one. Elegant glass charms cost money and are easy to lose.
Rubber bands work perfectly as improvised glass markers. For a small gathering, use a pack of multicolored bands and give each guest one color. For larger groups, let guests write their name on the band or mix and match to create a unique combination.
Simply slip a band around the stem of each wine glass so guests can tell whose glass is whose. For a decorative touch, slip in a small flower or charm under the band as a simple party favor. It takes under a minute to set up and costs effectively nothing.
10. Keep Your Teabag String in Place
This is tiny and delightful and you’ll use it every morning once you know about it. When you make a cup of tea and set the bag to steep, the string has a habit of sliding off the edge of the mug and landing in the water – leaving you fishing for a string with wet fingers.
Place a rubber band around your mug to hold the teabag string in place so the tag doesn’t slip into the water while the tea steeps. The band creates just enough resistance to hold the string against the outside of the mug. You can loop the string under the band or simply press it against the mug’s surface.
It works on mugs of any size and takes about two seconds. Small wins are still wins.
11. Stop Candles Wobbling and Dripping
Candles that don’t fit snugly in their holders rock around, melt unevenly, and tend to drip wax onto tablecloths and furniture. Buying a new holder that fits perfectly is one option. A rubber band is faster.

If a candle isn’t fitting snugly in its holder, wrap a rubber band around the base for a tighter fit. You can also secure a band slightly higher up the candle to catch any wax drips before they travel down onto your furniture.
Wrapping a large rubber band around the base of the candle protects your table from drips – the band catches them before they hit the surface. As a bonus, the rubber band can keep the candle from wobbling in the holder entirely. For a dinner party, this means one less thing to clean up at the end of the night.
12. DIY French Manicure Guide
A French manicure at home always sounds achievable until you’re trying to paint a perfectly straight line across the tip of your own fingernail with your non-dominant hand. The result is usually less “salon fresh” and more “approximation.”
Tie a rubber band over your cuticle, right below the nail tip, to use as a guide. Use your other fingers to hold the band tightly in place as you apply the polish, ensuring it sits straight for a clean line. Once the tips are done, finish with a top coat after the initial polish has dried.
It takes a moment of setup but produces noticeably better results. You can get professional-looking results at home without spending money at a salon. The rubber band acts as a stencil and a steady reference line all at once.
13. Wrangle Cables and Cords
The cable tangle behind most televisions, desks, and kitchen counters has become a defining feature of modern domestic life. It’s not dangerous, just deeply unsatisfying to look at and an absolute nightmare when you need to unplug one specific thing.
Rubber bands can completely change how you manage cords and cables, keeping them neatly coiled and tangle-free, which reduces clutter and saves the time you’d otherwise spend untangling them. Loop a rubber band around a coiled cord to hold the coil in place. Use different colored bands to color-code which cable belongs where.
For a more thorough organization, these clever design secrets from everyday objects show how a few simple materials can make domestic life significantly more manageable. Wrapping thin rubber bands spirally around chargers or headphone cables and tucking the connectors under the bands helps prevent fraying and tangling at the same time.
14. Keep a Spoon from Sliding into a Pot
You set a spoon across the top of a simmering pot and walk away. When you come back, the handle has slid in and the spoon is submerged in soup. It’s not a disaster, but it’s avoidable.
Don’t let your spoon slip into a boiling pot of broth or sauce. Keep metal, plastic, or wooden spoons upright by wrapping a rubber band around the handle where it rests at the edge of the pot. The rubber grips the pot’s rim and stops the handle from sliding. It works on pots with both rounded and angular edges.
This is especially useful when you’re simmering something slowly and stepping away from the stove for a few minutes – which is exactly when the spoon tends to migrate.
15. Keep Rolled Clothes Packed Tight in a Suitcase
Rolling clothes rather than folding them saves meaningful space in a suitcase. The problem is that rolls tend to loosen and expand once you’ve packed everything away, and by the time you reach your destination the contents have shifted and compacted into something less organized than when you started.
Roll each item of clothing into a compact tube-like shape to maximize space, but wrap a rubber band around each roll to keep it firmly packed. The band maintains the tension of the roll and stops it from expanding mid-journey.
Rolling clothing is the key to saving space when packing, and rubber bands let you go one step further by securing every roll to keep the case organized and tidy. For longer trips with more items, consider grouping rolls by outfit and banding them together as a set.
16. Track How Much Is Left in a Container
Opaque canisters for flour, sugar, coffee, or oats are great until you grab one thinking it’s full and discover there’s barely enough left to make what you need. Same problem with stored paint cans on a garage shelf.
For any canister or container that’s hard to see inside, use a rubber band on the outside to mark the current level of whatever’s stored inside. This trick works equally well for paint containers. When you refill or use some, slide the band up or down to the new level. At a glance, you know what you have.
For the pantry specifically, this eliminates the situation where you discover you’re out of something only when you need it. For the garage, it means you can check which paint cans have enough left for a touch-up job without opening them all.
17. Revive a Splayed Broom
Broom bristles spread and splay outward over time, losing the tight contact with the floor that makes them effective. The broom still looks like a broom but performs like a sad approximation of one, pushing debris around rather than gathering it.
A worn-out broom where sweeping has become virtually impossible can be brought back to life by wrapping a rubber band tightly around the bristles near the base. This reshapes them back into a firm, usable broom head.
Leave the band in place overnight for best results. When you remove it in the morning, the bristles should hold a tighter, more upright shape. For older brooms that have been splayed for a long time, wrapping them when stored helps prevent the spread from happening in the first place.
18. Emergency Earring Back Replacement
You’re dressed and ready and you just dropped the tiny metal back off an earring. It has disappeared into the floor, the carpet, or the void between the bathroom sink and the wall. You have approximately four minutes before you need to leave.
Cut a small square from a rubber band and secure it to the earring’s metal post. The rubber holds the jewelry in place and gives you peace of mind all day. Keep a few pre-cut squares in your jewelry box as spares for the next time this happens.
It’s not a permanent solution, but it’s a genuinely useful one. The rubber creates enough resistance to hold the earring securely through a normal day’s movement, and it won’t damage the post or the earring.
19. Make a DIY Stamp for Kids (or Yourself)
This last one skews creative, but it’s more practical than it sounds if you have children who like making things, or if you want a low-cost way to make personalized wrapping paper, cards, or fabric patterns.
Draw a simple image or letters on a piece of cardboard, cut rubber bands into strips, and glue them onto the cardboard to trace the image. Once it dries, dip your stamp in paint and press it onto paper. Rubber bands are well-suited for crafting and DIY projects – they hold objects together during glue-drying and create interesting patterns in painting and ink-dipping projects.
For kids, this is an afternoon activity that produces something usable. For adults, it’s an inexpensive way to create custom gift wrap or decorate plain notebooks. The setup takes ten minutes and the rubber bands do the work.
Start Using What You Already Have
The main thing rubber bands have going for them is that they’re already in your home. You don’t need to buy anything, order anything, or wait for a delivery. Every single idea on this list is executable within the next five minutes using what you already own. That’s a rarity for genuinely useful home tips.
The most immediately practical starting points: the jar lid trick if your grip strength is ever an issue, the soap dispenser band if you have kids, and the paint can scraper if you have any DIY projects pending. The cable management and hanger fixes, though, are the ones that tend to stick around longest. Once you’ve set them up, you stop thinking about the problems they solved because those problems simply don’t come up anymore. That’s what a good fix actually feels like: not a clever trick you remember, but a small annoyance you forget ever existed.
AI Disclaimer: This article was created with the assistance of AI tools and reviewed by a human editor.